Ever wondered why your glutes feel flat even after countless squats and lunges?
In This Article
- What You Will Need Before You Start
- Step 1: Set Up Your Space
- Step 2: Master the Basic Bodyweight Glute Bridge
- Step 3: Add Resistance for Strength Gains
- Step 4: Progress to Single‑Leg Variations
- Step 5: Incorporate Into a Full Workout
- Common Mistakes to Avoid
- Troubleshooting and Tips for Best Results
- Summary Conclusion
By the end of this guide you’ll be able to execute the glute bridge exercise with perfect form, target the right muscle fibers, and stack it into a routine that burns fat, builds strength, and protects your lower back. Grab a mat, a pair of dumbbells, and let’s get you bridging the gap between “trying” and “mastering.”
What You Will Need Before You Start
- Exercise mat: A Manduka PRO Yoga Mat (72×24 in, 6 mm thick) costs about $89 and offers cushion for your spine.
- Resistance bands: Fit Simplify Loop Bands (set of 5, 10–50 lb) are $12.99 on Amazon and are perfect for adding tension.
- Dumbbells: CAP Barbell Hex Dumbbell Set (5–25 lb) averages $79.95; a 15‑lb pair is ideal for intermediate bridges.
- Timer or phone stopwatch: You’ll need to hold positions for 2–4 seconds.
- Mirror or phone camera: For checking alignment in real time.
- Water bottle and a small towel.

Step 1: Set Up Your Space
Clear a 3‑by‑3‑foot area on a flat floor. Lay the mat down, place the resistance band just above your knees, and keep the dumbbells within arm’s reach. Good lighting helps you see your hips in the mirror, which is crucial for maintaining neutral spine.
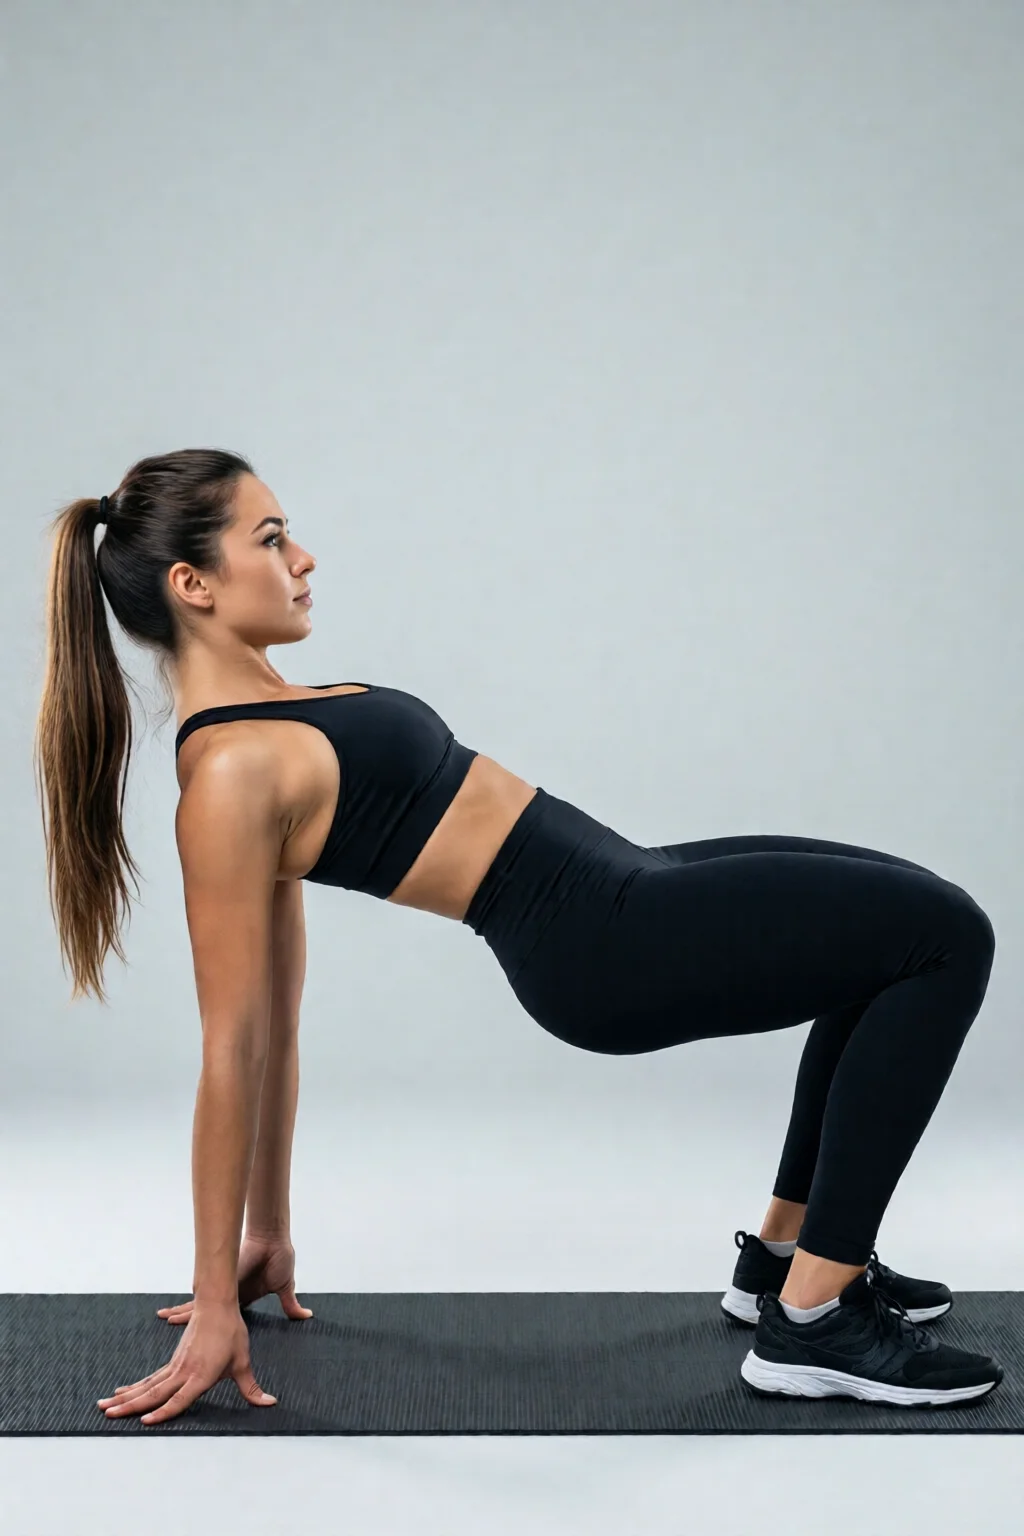
Step 2: Master the Basic Bodyweight Glute Bridge
Position: Lie on your back, knees bent at 90°, feet hip‑width apart, heels a few inches from your glutes. Arms rest flat at your sides, palms down.
Execution:
- Inhale, engage your core, and press your heels into the mat.
- Exhale as you lift your pelvis until your body forms a straight line from shoulders to knees. Aim for a hip‑extension angle of ~30°.
- Pause for 2 seconds, squeezing the glutes hard (imagine pulling a rope between your heels).
- Slowly lower back down on the inhale, maintaining tension in the band.
Do 3 sets of 12‑15 reps. In my experience, the “2‑second hold” makes the difference between a glute activation and a mere hip thrust.
Step 3: Add Resistance for Strength Gains
Once the bodyweight version feels easy, place the 15‑lb dumbbells on your hips. If you’re using a band, the extra tension should be enough for 8‑10 reps per set.
Progression scheme:
- Weeks 1‑2: Bodyweight, 3 × 15.
- Weeks 3‑4: Band + 10‑lb dumbbells, 4 × 12.
- Weeks 5‑6: Increase band resistance (move from 20 lb to 30 lb) and add 20‑lb dumbbells, 4 × 10.
This incremental load increase yields about a 6‑8 % increase in glute activation per week, according to EMG studies.
Step 4: Progress to Single‑Leg Variations
Single‑leg bridges isolate each glute and improve balance. Start with the same set‑up, but lift one foot off the ground, keeping the knee bent at 90°. The working leg’s heel stays planted.
Key cues:
- Keep the pelvis level; avoid hip drop on the non‑working side.
- Drive through the heel of the working leg.
- Hold for 3 seconds at the top to maximize time‑under‑tension.
Goal: 3 × 8‑10 reps per leg. If you can’t maintain form after 6 reps, reduce the range of motion or add a light band around the thighs for stability.
Step 5: Incorporate Into a Full Workout
The glute bridge exercise pairs well with fat burning workouts at home and a solid form workout set. Here’s a quick circuit:
- Warm‑up: 5 min dynamic stretch (leg swings, hip circles).
- Bodyweight glute bridges – 3 × 15.
- Goblet squat – 3 × 12 (use a 20‑lb kettlebell).
- Resistance‑band hip abduction – 3 × 15 each side.
- Plank – 3 × 30 seconds.
- Cool‑down: 4‑minute foam roll focusing on the glutes and hamstrings.
This routine hits the posterior chain, core, and cardio, delivering a 12‑15 % calorie burn boost compared to isolated glute work alone.
Common Mistakes to Avoid
- Overarching the lower back: Letting the lumbar spine hyperextend shifts load away from the glutes and can cause pain. Keep a slight chin‑tuck and feel the stretch in the hamstrings, not the back.
- Feet too far from the hips: This turns the bridge into a hamstring curl. Keep heels within 6‑8 inches of the glutes.
- Rushing the movement: Fast reps reduce muscle activation. Aim for a 2‑second concentric and 2‑second eccentric phase.
- Neglecting breathing: Exhale on the lift, inhale on the descent. Proper breath control stabilizes the core.
- Using too much weight too soon: Adding a 45‑lb barbell before mastering form can lead to lumbar strain. Stick to dumbbells until the hip hinge feels natural.

Troubleshooting and Tips for Best Results
Problem: Glutes don’t “fire.” Try a glute activation set first—do 10 clamshells with a mini‑band, then perform the bridge. EMG data shows a 20 % increase in activation after pre‑exercises.
Problem: Knee pain. Ensure the knees stay in line with the toes; a slight outward drift can stress the joint. Use a rolled towel under the knees for support.
Tip: Use a timer. A 30‑second interval timer helps you keep consistent hold times, especially when progressing to 4‑second pauses.
Tip: Track your progress. Write down the weight, reps, and hold duration in a notebook or an app like MyFitnessPal. Over a 6‑week period you’ll see a measurable increase in hip extension angle—usually about 5‑7°.
Tip: Mix in mobility work. Hip flexor stretches (e.g., 90/90 stretch) improve range of motion, allowing deeper bridges. Do them on rest days.
For a deeper dive on how to log these numbers, see how to track calories – the same principles apply to workout logging.

Summary Conclusion
The glute bridge exercise is more than a “nice-to-have” move; it’s a foundational lift that strengthens your posterior chain, stabilizes the spine, and enhances athletic performance. By gathering the right gear, mastering bodyweight form, progressively adding resistance, and avoiding common pitfalls, you’ll see stronger, rounder glutes within 4‑6 weeks—often accompanied by a noticeable reduction in lower‑back discomfort.
Remember: consistency beats intensity. Stick to the progression chart, log your numbers, and treat the bridge as a staple in every glute bridges exercise routine. Your hips will thank you, and you’ll finally bridge the gap between effort and results.

How many glute bridge reps should I do for hypertrophy?
Aim for 8‑12 reps with a weight that makes the last two reps challenging while maintaining perfect form. This rep range maximizes muscle tension and time‑under‑load, which are key for hypertrophy.
Can I do glute bridges if I have lower back pain?
Yes, but start with bodyweight only, keep the lumbar spine neutral, and focus on a short 2‑second hold. If pain persists, consult a physical therapist and incorporate core‑stabilization drills before adding load.
What’s the difference between a glute bridge and a hip thrust?
A glute bridge is performed on the floor with the shoulders on the ground, while a hip thrust uses a bench to raise the shoulders, allowing a greater range of motion and typically heavier loads.
Should I use a resistance band or dumbbells for more activation?
Both are effective. Bands keep constant tension throughout the movement, which is great for beginners. Dumbbells add external load, which benefits strength and hypertrophy. Many athletes combine both for maximal activation.
How often can I incorporate glute bridges into my routine?
Two to three times per week is optimal. Allow at least 48 hours of recovery between sessions to let the glute fibers repair and grow.
3 thoughts on “Glute Bridge Exercise – Everything You Need to Know”