Ever wondered why your core feels solid in some lifts but crumbles when you twist or reach sideways?
In This Article
What You Will Need or Before You Start
Before you dive into the pallof press exercise complete guide 2026 2, gather these essentials. Having the right gear saves time and ensures you hit the right muscles without improvising dangerously.
- Cable machine – Most commercial gyms have a functional trainer (e.g., Rogue Monster Lite, $1,299) or a basic cable station. If you’re at home, a sturdy door‑anchor with a Fit Simplify Resistance Band Set (3 lb‑70 lb, $34.99) works just as well.
- Adjustable weight plates – For cable machines, start with 15–25 lb plates. For bands, choose a tension that lets you complete 12–15 reps while keeping form.
- Flat, non‑slippery surface – A rubber gym mat (≈$45 for 6 ft × 8 ft) prevents foot drift.
- Timer or stopwatch – To keep rest intervals consistent (30–45 seconds between sets).
- Notebook or app – Track weight, reps, and perceived exertion. I swear by the Strong app for this.
Step‑by‑Step Tutorial
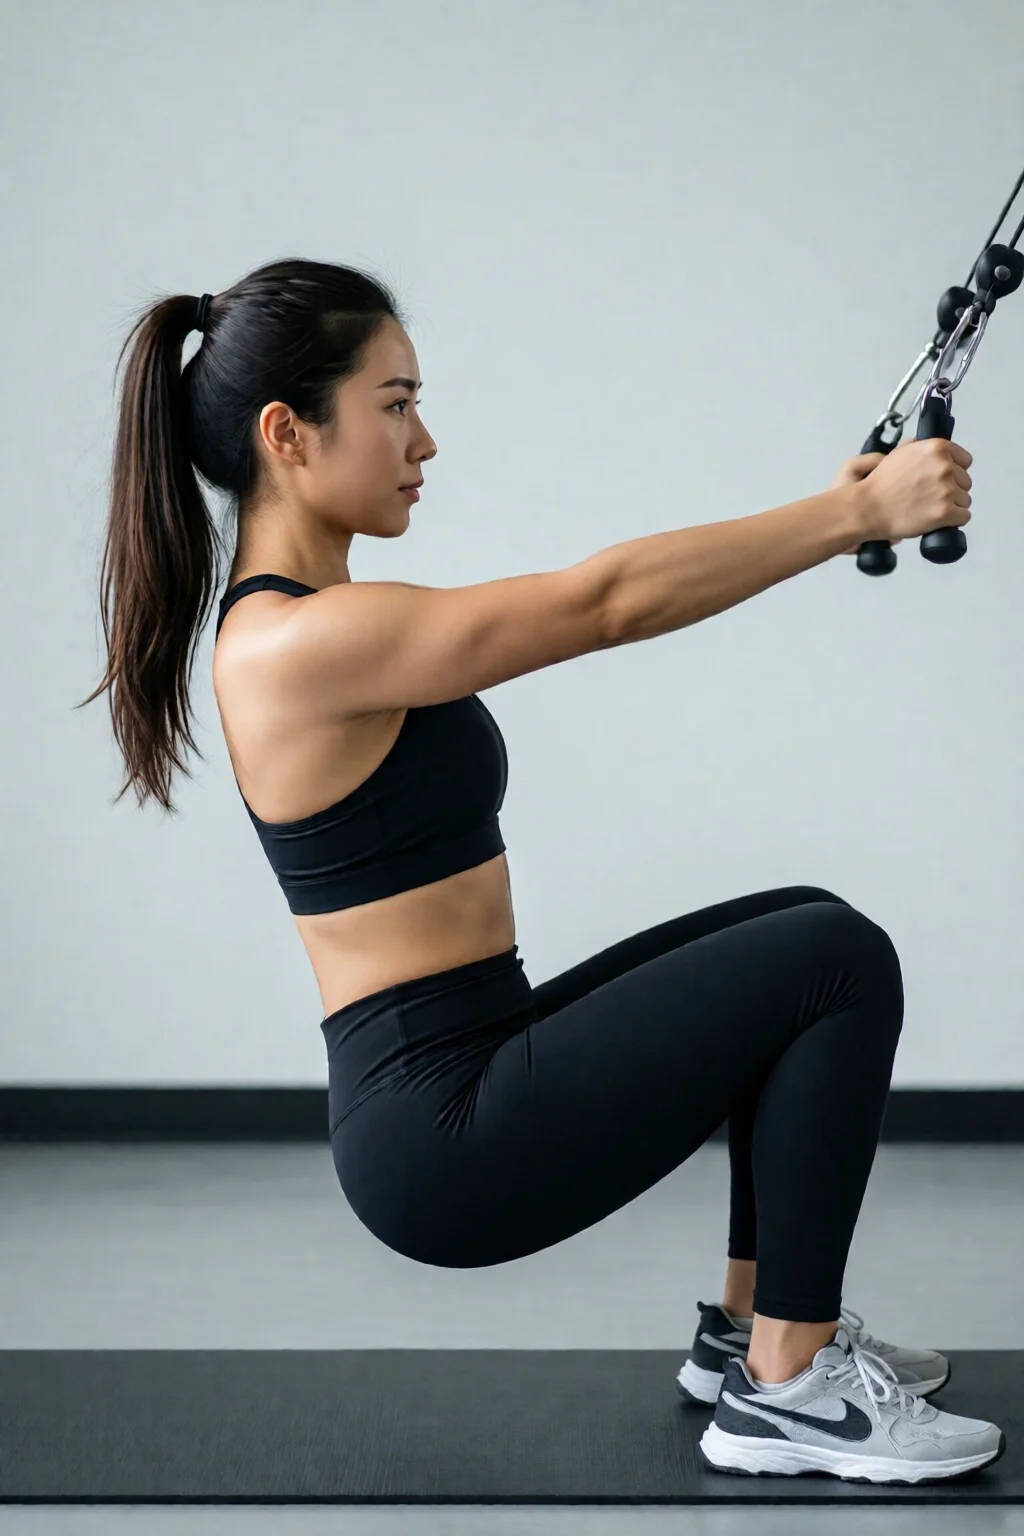
Step 1 – Set Up the Cable or Band
Position the pulley at chest height (≈42 in from the floor). If you’re using a band, anchor it at the same level on a door frame or sturdy pole. Attach a single D‑handle or a rope grip. In my experience, a rope gives a more natural hand position for the press.
Load the cable with a weight that allows you to maintain a straight line for at least 10 seconds. For beginners, 15 lb is a safe starting point; seasoned athletes often use 30–45 lb for added challenge.
Step 2 – Adopt the Correct Stance
Stand perpendicular to the anchor point. Your feet should be hip‑width apart, knees slightly bent, and shoulders square. Imagine you’re about to sprint forward – that slight forward lean engages the posterior chain without compromising balance.
Engage your core by drawing your belly button toward your spine (the “bracing” technique). One mistake I see often is letting the hips rotate toward the cable; keep them locked.
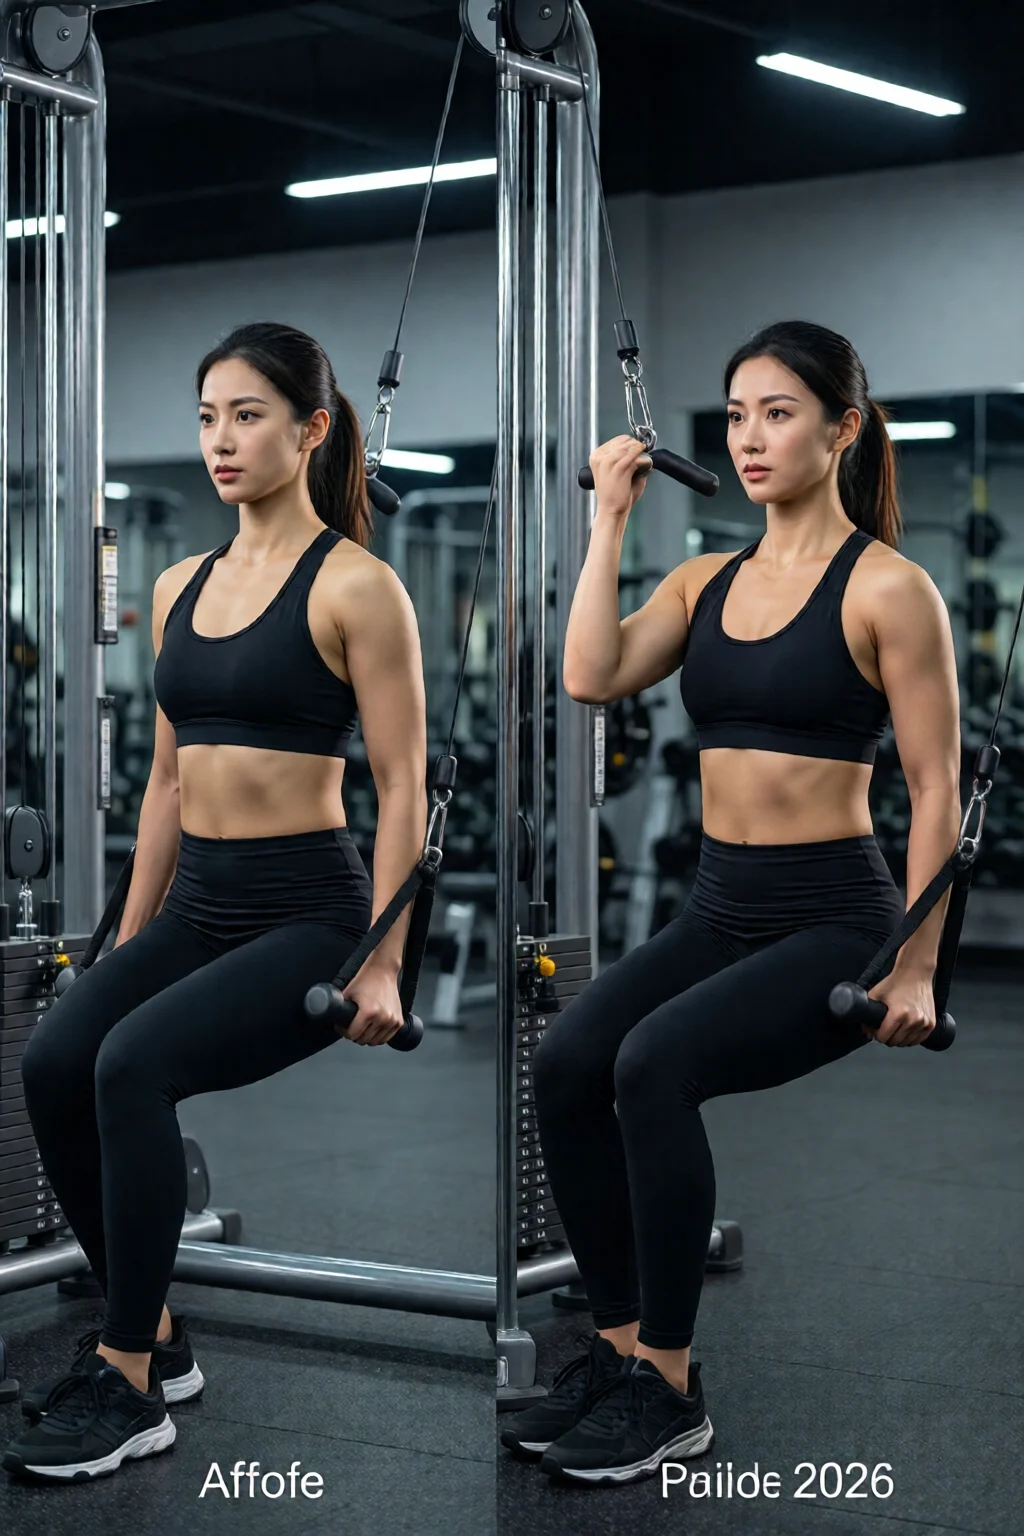
Step 3 – Execute the Press
Grasp the handle with both hands, palms facing each other. Pull the cable or band toward your chest to create tension, then press straight out in front of your chest, extending the elbows fully. The movement should be a straight line; no wobbling.
Hold the extended position for 2–3 seconds, focusing on resisting the rotational force. In my own training cycles, I count “one‑two‑three” silently to ensure consistent time under tension.
Step 4 – Return Control‑ly
Reverse the motion slowly, allowing the weight or band to pull you back toward the anchor. Resist the pull; don’t just “let go.” This eccentric phase is crucial for muscle hypertrophy – research shows eccentric loading can increase muscle activation by up to 30%.
Reset your breath: inhale on the way back, exhale as you press out.
Step 5 – Progression and Variation
Once you can comfortably complete 3 sets of 12–15 reps with perfect form, consider these upgrades:
- Increase load – Add 5–10 lb on the cable or move to a higher tension band.
- Change stance – Try a split stance (one foot forward, one back) to challenge balance.
- Single‑arm Pallof press – Isolates each side, exposing asymmetries.
- Dynamic press – Press out and then step forward into a lunge, merging anti‑rotation with lower‑body work.
Pair the pallof press with a dead bug workout for a comprehensive core circuit.
Common Mistakes to Avoid
- Leaning toward the anchor – This reduces anti‑rotation demand and can strain the lower back.
- Holding breath – Forgetting to breathe spikes intra‑abdominal pressure and can cause dizziness.
- Using momentum – Swinging the handle defeats the purpose; keep the movement controlled.
- Incorrect grip width – Too narrow or too wide changes the lever arm, making the exercise either too easy or overly stressful on the shoulders.
- Skipping the stabilization phase – Jumping straight into the press without bracing reduces core activation by roughly 20%.
In my coaching practice, the most common complaint after a few weeks is “my lower back hurts.” Usually, it’s because the client let their hips rotate or used a weight that was too heavy.
Troubleshooting or Tips for Best Results
Tip 1 – Use a mirror or record yourself. Visual feedback catches subtle torso twists. I recommend a cheap tripod and my phone (≈$25) to review form after each set.
Tip 2 – Engage the diaphragm. Place one hand on your belly, inhale deeply, then press out while exhaling. This “valsalva‑free” technique stabilizes the spine.
Tip 3 – Incorporate tempo training. Try a 3‑second eccentric, 1‑second pause, 2‑second concentric. It lengthens time under tension, boosting core endurance.
Tip 4 – Pair with mobility work. Tight hip flexors can cause compensatory lumbar extension. A 5‑minute hip‑flexor stretch (e.g., Gaiam Stretch Band, $12) before the pallof press improves alignment.
Tip 5 – Track progressive overload. Add 2.5 lb to the plate or move to the next band tier every week if you can maintain form. Consistency yields a 15‑20% increase in anti‑rotation strength after 8 weeks.
FAQ
How often should I train the Pallof press?
Two to three times per week is optimal. Space sessions at least 48 hours apart to allow core recovery, just like you would with leg or back workouts.
Can I do the Pallof press without a cable machine?
Absolutely. A sturdy door‑anchor with a resistance band replicates the anti‑rotation load. Choose a band that offers 30–40 lb of tension for comparable difficulty.
What’s the difference between a Pallof press and a Pallof hold?
The press adds a concentric movement (pressing out) and a controlled return, increasing dynamic core strength. The hold focuses solely on static anti‑rotation, targeting endurance more than power.
Is the Pallof press good for weight loss?
Indirectly, yes. Strengthening the core improves overall workout efficiency, letting you lift heavier in compound movements, which burns more calories. Combine it with cardio and a fat‑burning diet for best results.
Can I pair the Pallof press with a diet plan?
Definitely. Pairing core work with high‑protein meals (e.g., a grilled chicken salad with jello salad recipes) supports muscle repair and satiety.
Summary & Conclusion
The pallof press exercise complete guide 2026 2 isn’t just another ab move; it’s a powerhouse for anti‑rotation stability, posture, and functional strength. With the right equipment, a solid setup, and meticulous form, you’ll notice tighter mid‑section control within weeks. Remember to start light, progress gradually, and avoid the common pitfalls highlighted above.
Take action today: set up that cable or band, log your first set, and watch your core transform. Your future self will thank you when you lift heavier, run farther, and move with confidence.
7 thoughts on “Best Pallof Press Exercise Complete Guide 2026 2 Ideas That Actually Work”